"You are so creative!" I have heard that phrase constantly since I was little. DIY, Refashioning, Crafting, Sewing, Woodworking. I love it all! Now I have a place to keep my favorite projects or ideas organized and share them with you!


Wednesday, June 30, 2010

Girls Leggings Out of a Women's Sweater.

Photobucket

Yep that's right those adorable striped green legging used to be a women's sweater. Plus they took less time to make than it took my husband to mow our yard!

I was cruising around a neat website called Instructables It is a website where people can enter their tutorials on how to make things. Some things are cool. Some things are just plain weird. I have not been to the site too much and find it hard to search for certain things. It is more the luck of the draw. Well I just happened to come across the instructable to make leggings out of a women's sweater by only sewing two seams.

Way too Cool! I had to try it. Didn't find it too hard. Coming soon will be a follow up post on how to make a matching hat, but my machine was acting up again tonight and I am not sure how to fix it now. (so bummed)

Photobucket Here is where I read the how to. You have to buy a membership to get all the details, but I got enough from it to know what I was doing.


So here is my starter sweater. $1 is what I paid for it. Our local thrift store has a clearance rack set up and since it is the middle of the summer this nice green stripped sweater was on it. Good thing too because green happens to be my girl's favorite color! Plus stripes on leggings are so the "in" thing right now.

Photobucket
So the first step is put the sweater on your child with one leg through the arm and using the neck of the sweater as the waist.

Photobucket
Find where your child's belly button hits and put a pin there.

Photobucket
Take off the sweater and draw or cut a straight line from the pin to the armpit area of the sweater. I ended up cutting the crotch a bit big big but it was way easy to sew it smaller. Not so easy to make it larger.

I took this piece and laid it on the other arm and trimmed off the other arm the same way.

Photobucket
Then take your two cut off sleeves and turn them inside out and pin the crotch seam together. This is seam number one in the project.

Seem number two is to make a waistband. You have to cut the collar off. Actually you cut a bit more than just the collar. I cut straight across the top once the crotch seem was sewn so it was a straight top. Then I rolled it down once and sewed it to make a place of the elastic to go thought.

Photobucket

There you have it. Still not perfect but my first try. I am happy!
Photobucket

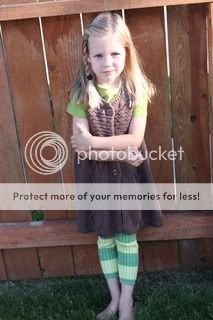
My girl is happy too. She is really starting to like this modeling thing, so here is the photo shoot.

Photobucket

Photobucket

Photobucket
She has to show off what she can do as well, while she is at it.
Photobucket
She called this her serious face.

Tuesday, June 29, 2010

T-shirt Reborn #2

Photobucket

I decided the Reborn T-shirt was such a fun project I had to try it again. I figured I did it the super easy way, now it was time to get funky. Do some serious de-construction and reconstruction. Ok not THAT serious but this was a bit more of an art project than the first. I got to really get into my color choices and I love what I came up with. I got both starter shirts at Goodwill.

Photobucket
A plain orange Green Dog brand T-shirt with a grey collar in like new condition.

Photobucket
And this, (sorry already started cutting) A Carters brand long sleeved PJ shirt that had no matching bottoms in sight, and honestly that Puppy was way too cute for just PJ's or rags.

Photobucket
So I cut him out.

Photobucket
And I cut this part of the sleeve out.

Photobucket
To use this part.

Photobucket
Then I turned it.

Photobucket
And trimmed most of the blue off it like this.

Photobucket

Photobucket
And sewed it to the end of the sleeve of the orange shirt like this. I like the underside stitching to show adds more color and makes it look more de-constructed. So I sewed the cut piece on inside out to the right side out shirt. Yes on purpose!

Photobucket
I did the same with the bottom of the PJ shirt. Cut it off, turned it and sewed it to the bottom of the orange shirt with the blue underside stitching showing. Feeling pretty proud of myself at this point. The collar of the orange shirt just happened to be a pretty close match.

Photobucket
Then came time for the puppy to find his new home. So I pinned him in place.

Then he must not have liked his new home too much because he didn't want to go on. My machine thread kept breaking. The rubbery paint used for the puppy didn't slide under my presser foot and got stuck constantly. I really needed to use some fusible web for stability as well so the puppy didn't shift, but I didn't have any, and I wasn't going to wait until I did. Nor did I want to spend anymore money on the project. I just made due.

Photobucket

If you are doing this project I suggest you get some fusible web or water soluble spray adhesive to hold the piece in place otherwise you may end up a bit frustrated. I did get frustrated, but I am not a perfectionist and see my final piece as artistic, and still much better than the original two pieces. Totally not as professional looking as it could have been, but I am happy.
Photobucket

Photobucket

This post was featured on...

Here

T-shirt Reborn #1

Photobucket

My daugher has a favorite t-shirt that she liked to wear constantly the last two summers. Not only did this shirt not fit this year, but it was not something I could sell because it was starting to fall apart. Considering we go the shirt at a garage sale to begin with this shirt had been loved dearly!

Photobucket

Photobucket

But it wasn't gone forever. It just needed to be reborn and I was waiting for just the right opportunity. Well that opportunity came today when I found this pink shirt at a rummage. I had a small blue ink stain right in the center but other than that the shirt was in great shape. Plus because of the small stain, it only cost 25 cents!


Photobucket

I am sure by now you can see where I am going to go with this. It was almost a no-brainer for me!

The reason why this shirt was SO COOL was that the picture in the middle is not only the picture of a butterfly but also if you look at it at a differnt angle it changes into a butterfly! Way cool to any 5 year old I assure you.

Photobucket

Photobucket

So as you can see I trimmed around the picture and decided to leave a small white border around it so that there was space between the pink on the smaller boarder and the pink of the larger shirt.

Then pin the picture onto the larger shirt where you would like it to be and sew around it. I kept with the zig zag stich so that it matched the zig zag stich on the rest of the picture.

Photobucket

On knit you really have to be careful not to stretch the fabric while sewing. Mine did pucker a bit but the overall look was still fine. Even using a stablizer may have helped some and I will plan on that for future projects.

I do however have a very happy little girl with a new favorite T-shirt.

Photobucket

Photobucket

Monday, June 21, 2010

Baby Bottle or Cup Leash

Put a stop to the famous Uh-oh game by making one of these!

Photobucket

What is the Uh-oh game? Well it is that nice little game young children like to play when they are sitting in a highchair, or stroller, car seat, or even sometimes on your lap. The game where they take whatever they are holding and drop it on the ground and then look at you and say.... "Uh-oh" Then you pick it up for them and it repeats over and over and over again until you go insane.

Well I had an uh-oh child last summer and we were heading to Disney! Not exactly the best place to be playing the Uh-oh game. Don't want to keep stopping every 30 seconds to grab sippy cups off the ground, nor did I want to search for a place to disinfect them once they have traveled to the ground either. So I came up with this little project and it worked great!

What you need:
Photobucket
Ribbon of Choice- I used 3/4" ribbon

Photobucket

Veggie Rubber band- The kind that comes on the bottom of your broccoli

I used as sewing machine but you really don't need to.
You can also get fancy and use Velcro but not needed either.

How:
Take your ribbon, you may want to melt the ends a little with a lighter or match so that they don't fray. Then string one end through the rubber band and sew it back onto itself so that it is attached around the rubber band. Be careful not to sew the rubber band. It will make it week and it will break easier and not last as long. If you do not sew, then do a good old double knot.
Then you will have this.

Photobucket

Then attach it to your favorite bottle.

Photobucket

Or cup.

Photobucket

Or Tummy Tickler bottles (love these by the way, never leak! We reuse them for water.)

Photobucket

Then head out to your stroller and look for a good place to attach it. We use the metal bar on the side of ours. Measure how long you will need your string to be. You want it short enough that the bottle will not touch the ground with dropped but long enough that it will still get to your child's mouth and to the cup holder if you have one. Then tie the end onto the stroller in a double knot. (you can get fancy and do Velcro, but I don't have the time to get too fancy and knots hold better any day.)

Photobucket

Not only did it keep the drinks near the children all day to keep them hydrated, it saved us from going crazy! If one of kids dropped their water bottles, they just grabbed the ribbon and were able to fish it back up themselves! The drinks were always accessible to them, and we never once had to pick a drink up from the dirty ground.

Other possible uses:
Take it off the stroller and tie it to the highchair at the resturant. Attach it to a car seat for older kids on long car trips. Use it for other things such as toys or stuffed animals.

Sunday, June 20, 2010

Dancing Ribbon Rings

This is a good one for the 4th of July! Super easy! Costs very little to make a TON of these things.

Photobucket

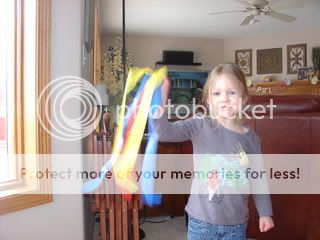
I got this idea from an elementary music teacher. She wanted to get dancing ribbon rings for her classroom similar to the ones you see here. But obviously 30 rings was not in her supply budget.
Well I have seen these made before with all sorts of thing like a ring cut out of a paper plate and crape paper streamers but honestly that will not hold up to the elementary classroom at all.
When I heard her telling another teacher about how to do these I had no idea how easy and inexpensive they really were, and how cool they end up being.
I have done this craft activity for a children's 4th of July parade for 3 or 4 years now. It is great because you can make hundreds of these things for around $15 or so.

Photobucket
What you need:
Plastic tape- non-sticky tape similar to caution tape found right by caution tape in hardware stores (I buy mine at Ace Hardware for you locals)Around $3 a roll. Each roll has 300 feet on it. For the 4th of July we use Red, White and Blue!
Plastic Shower curtain rings- I get a pack of 12 clear ones for around $1 at dollar general. If you want to go more "green", I often see plastic shower curtain rings at second hand stores in a bag marked for around $.50 and have bought those in the past too, just run them though the dishwasher first.
Scissors
Yard Stick -optional


Measure out one yard of plastic tape and cut. Repeat two more times so that you have three of these yard lengths. I like to do one color of each.

Take your plastic ring and make sure it is snapped shut. Then take one length of plastic tape and tie it in the middle of the length around the ring. You only need one knot. Like you are starting to tie your shoe. Do it right in the middle of the length so that you have two half yard lengths hanging from the ribbon. Don't pull TOOO hard or you will stretch and break the plastic tape. Once you have gotten your knot down to a small size, slide it into the the narrow part of the ring where you snapped the ring together. Repeat with your other two, yard lengths of ribbon and you are done.

Photobucket

Photobucket

Like I said we have been doing these for a few years now so I got out some of our older photos.
Photobucket

Photobucket

These are great to wave in the air to music. March with down the street. Pretend they are sparklers and draw things with them in the air. Big kids like to play catch with them or toss them way up high like fireworks. The tails flutter though the sky as they travel up and down.