
I was going to wait until the big "kids bathroom redo" reveal to post this project but it turned out too cool not to share now.
I was inspired by a couple pins I saw on Pinterest.
The first was this one with the kid's photos above each of the towel hooks.
We already use hooks in the bathroom so I thought this a clever idea to fill the space above them.
Easy enough... but you know me.. I can't just buy frames I have to do something more fun.
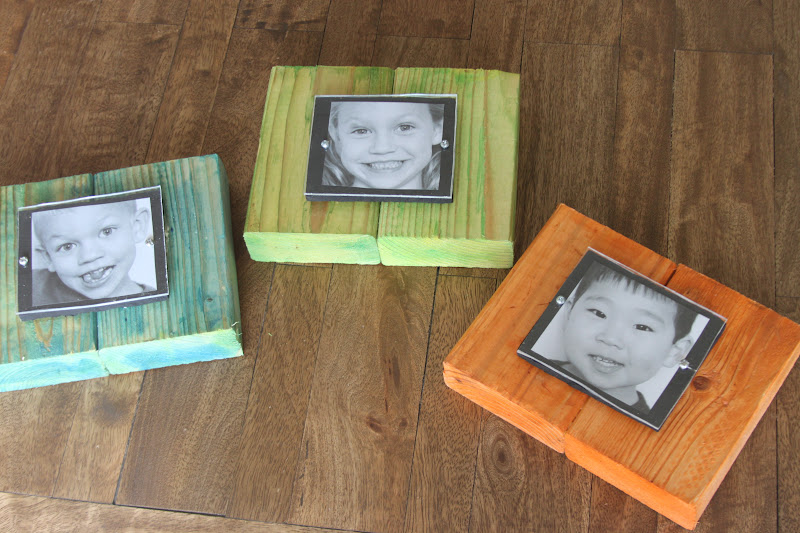
I also saw these frames on Pinterest someone is selling them on ETSY. Someone else pinned them and said they would make them using scrap wood and frames from Walmart. I like the original design better. Why? Because I had everything I needed in my house to make them. No need to buy Walmart frames.
I used scrap 2 by 4's, some scrap pallet wood, scrap plexiglass, and small screws.
As well as some clamps, and a box cutter, a drill, saw, wood glue, etc.

I liked the bright color of her frames. But I didn't want to go and buy some fancy wood stain so I brainstormed how I could paint the wood yet still see the wood grain.
Enter water colors!
GENIOUS!!!

I had the kids help paint their own blocks of wood with water colors. It was the perfect thing to use to get the look I wanted.
Please note: We color code our children. Their cups, coats and towels are always the same color for each child. Green Blue and Orange respectfully thus the color choices. It makes life easier. That way everyone knows who's stuff is who's.
After they painted them, I put a few coats of clear poly spray paint to seal in the color from any bathroom moisture.

I then painted some scrap from a wood pallet black to add some more dimension to the frame and used some plexiglass scraps we had in the basement and some screws to finish off the frames.

Yep! I totally manned up and cut my own plexiglass after reading a few tutorials I found on Pinterest of course. I was pretty proud of myself. I really wanted to ask my husband to do it for me, but then I knew I would be waiting for a while. It really wasn't that difficult to do myself once I tried.

The photos I took today and printed them off on regular printer paper in grey scale.
They didn't cost anything and I can easily change them out whenever I want to.
So my total cost for this project came to $0. I didn't buy a thing, it was all just stuff we had laying around. It sounds like my house is full of junk doesn't it?
This means if you are a friend of mine and you want to do one of these projects you might want to call me to see what junk I have laying around first before you go buy supplies.

Another cool thing about using 2 by 4's is that the frames can also stand up on their own.

Or you can hang them up.

Now the kids know where to hang their towels.

Linking up here:


AWESOME! I want to do a really colorful gallery wall and these would be perfect! (I color code my boys, too, though not quite to the same extent.)
ReplyDeleteQuestion - what kind of watercolors are those? Not regular old crayola, are they?
Yep just crayola! They might be an older set we have had for years. We did a bit of color mixing for the blue and green, adding a bit of yellow to get the desired tones. Spraying them with a clear coat once the water color is dry, should seal everything in when you are finished.
Delete