"You are so creative!" I have heard that phrase constantly since I was little. DIY, Refashioning, Crafting, Sewing, Woodworking. I love it all! Now I have a place to keep my favorite projects or ideas organized and share them with you!


Thursday, March 29, 2012

Easter Basket Stuffer Ideas 2012

I found three cute stuffer ideas online that I wanted to try out for myself this year I must share with you.


Doughnut Bunnies

What do you think of these doughnut bunnies. My kids love powdered doughnuts so these doughnut bunnies will make a good breakfast for them early on Easter morning before we get to brunch, and they will be found in their baskets.

These doughnuts are Little Debbie brand and come in a box that has six individual packages that contain 4 doughnuts each. The packages, since they come in a box, do not have any writing on them. Our box cost $2.19.

I found the idea for the doughnut bunnies here.
Jeans Crafty Corner
Pinned Image

But I didn't want to do the work of making my own rabbit face, so I searched for bunny coloring pages and the perfect bunny face popped up. When I printed the image it was just the right size for this project saving me time.

Here is a link to the bunny face image I used.


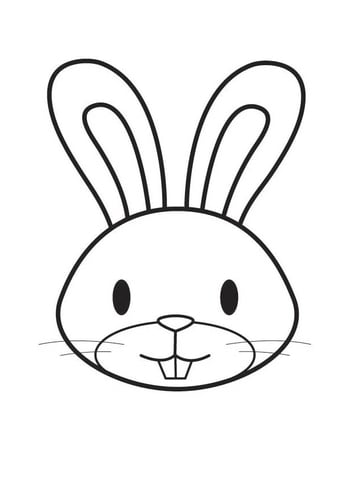
So I just printed three of these out onto paper I had, and cut them out.
I also cut out four oval shapes and used a marker to draw two lines on them to make my bunny hands and feet. Then I attached them with a low temp glue gun.


Oh and don't forget the cotton ball bunny tail!

Chocolate Nest Spoons
Another cute idea I saw and had to try were Chocolate Nest Spoons.
I found the simple, adorable and yummy idea over at Cute Food For Kids.
She has a great tutorial so hop over there for the how to.

Simply melt chocolate chips, dip in a spoon, add your chocolate mini eggs and some chocolate sprinkles (I went for the individual package of mini eggs to save myself from finishing the large bag so my cost was $.69 for my little package and I had enough eggs to make 4 spoons, and one egg leftover for me to enjoy.)
I also used our ZooPals spoons since we already had them on hand.
Once they were dry I wrapped them in plastic wrap and secured them with a twist tie.

Goldfish Carrots

I posted about these early last month.
Click below for how I made them.


There you have it. Three simple but cute ways to stuff your Easter baskets.

Thursday, March 22, 2012

Stained Glass Tissue Paper Cross


It's not too often I find a craft project that all three of my kids are able to do all on their own levels, with minimal mess, and awesome results.

I am in LOVE with this project.
We had a rainy day outside today, so plenty of time to work on it.

I don't know why I didn't know about this before this year. I guess I was thinking in my mind that this was the old wax paper and iron project, and skipped it. IT'S NOT.
I know my three kids are not ready for working with an iron.

Anyway.. did I mention I LOVE this project. Well I do, ever so much!!
I want to give credit to Frills Fluff and Trucks where I found the idea, pinned to Pinterest of course.
Supplies:
Clear contact paper
(we got ours at Dollar Tree)
Colored tissue paper
(we save tissue from birthday parties and Christmas, yes even other kids birthday parties you can find me folding piles of this stuff  to take home.)
Scissors
Black Construction Paper, or another color is fine.


How to:
Cut out a rectangle of construction paper.
Peel off the backing and tape the contact paper rectangle sticky side up to the counter. I secured ours with tape on the four corners.


 Use black construction paper strips make an outline of a cross. I did this part for my 2 year old, but my 7 year old can have fun creating her own cross outline which will make the project more challenging for her. For my 4 year old I put part of the cross up there with some missing pieces, and gave him the right length pieces he would need to finish the shape, and he could finish it like a puzzle from there.
That is how this project challenged each child on their own level.


Then cut out or rip small pieces of tissue paper. Then you cover the inside of the cross with the tissue paper. Overlapping is fine. The goal is to cover the entire inside of the cross. The tissue will easily stick to the contact paper. No glue, no mess, no irons.


Once the center of the cross shape is covered. I carefully cut around the cross outline leaving a half of an inch or so of contact paper boarder.

That boarder now becomes the tape you use to stick your masterpiece to the window.


They look so cool!


You can make eggs, flowers, whatever shape you want.
I can't wait to see what my daughter decides to make after school today.


Update!!! I knew my creative girl would not dissapoint me. I was not allowed to see until she was finished. Here are her creations.


She started with the bunny, then made the sun, the egg and the next day made the chick.


Linking up here:

For the Kids Friday

Monday, March 19, 2012

Flintstone's Kids???

Fred Flintstone - the-flintstones photo


My 4 year old son came up to me today and said.

"Mom, We are not Flintstone's Kids, We are really GOD'S Kids"

I told him he is right.

The Lego Birthday Party


Well the big day finally came! My baby boy is now 3!
He loves LEGO so we had ourselves a LEGO Party!


The Yellow Bucket came from Dollar Tree I added a Lego Mini figure face and made a Duplo building station at our little kids table.


I made a nice little banner out of construction paper and printer paper. I found and downloaded a Lego Font and used that to print off the letters of his name.


His big sister built him a name table centerpiece out of Duplos.


We turned my coffee table into a Lego building center. You could build anything even a car so that you could race it down the.....


Car race ramp!!!!

I just took the spare pocket door from the basement and added some colored electrical tape and some checkered flags.


It propped up perfectly at the right height and angle by using a folding papasan chair we had.


The Anti-Cake

The birthday boy is not a fan of cake.. So when he choose Jello cups for his birthday I couldn't have chosen a better Lego colored dessert idea. I love how it turned out on my most favorite ever cupcake stand. I use these things all the time for everything. They are sturdy and store fairly compact. Super sturdy, dishwasher safe. Great Price compared to others I looked at. Did I mention I LOVE this cupcake stand??? Big sister even decorated the stand with some construction paper and her fancy cut scissors.


We made this room the large motor room. Our crawling tunnel and toddler trampoline are just the right color for a Lego themed party and added a lot of silly fun when paired with a couple balloons. Funny how putting something old in a new room makes it so much more interesting and new!
They had a blast in here.

I had started a project with a pallet in our entry way but had not made much progress on it. Yet if I moved it I would have a huge empty wall. So I used it to my advantage.


I made my own Caution tape from yellow streamers I had on hand and put my paper Lego Man up there with the birthday number of 3.
It made a good welcome sign for the party, and the wood just make it look a bit more constructive!


Then there are Lego bubbles I made.
Read about those here.


And the yellow bags from Dollar Tree that I added mini figure faces too.
They held the bubbles and other pinata goodies for guests to take home.


Our Kleenex box Lego pinata was a HIT!

It opened only after a few hits from the birthday boy,  (which I planned by only closing it with a couple tiny pieces of tape) which was a good idea since we had a few people fighting over who got to hit next. I dislike pinatas that take forever to open.

To read about how I made it click here.


 Fun eating and playing with friends and cousins!

The birthday boy had a fun day, but he didn't much care for all the attention being on him. He didn't like people singing happy birthday to him and he refused to blow out the candles because everyone was watching him. "I'm too shy." He always says. Other than that he had a blast playing and having fun.

Linking up here:
For the Kids Friday

Star Wars Rocks

Ever subconciously store something in your brain and forget that you put it there. I do it all the time. That is why when I saw a rock in our yard that looked like Darth Vader's head I thought to myself... I needed to paint it just like Darth Vader and then started to look for rocks that were the right shape for the other characters, I thought I had an origional idea..


But it was not original, a few months ago I had been on the Star Wars website... yes there is a Star Wars Website!!! and saw the craft idea of painting rocks to look like Star Wars characters.
Yet... I thought I had just come up with this totally awesome and cool idea all on my own. Until I went on Pinterest and saw a photo pinned of the rocks. The photo was familiar and then I remembered where I had seen it.

Oh well... I think my rocks are cooler. He he.  I just used my paint pens, and the rocks I choose are their natural colors taken out of my landscaping of river rocks.


I had fun making them and my boys think they are way cool!

Linking up here:
For the Kids Friday

Thursday, March 15, 2012

Did You Start Your Tomatoes Yet?


We started ours today, actually a week late according to some online planting guides. But none the less. So exciting! I am ready to sprout things this year using recycled stuff around the house as sprouting starters.


We used empty toilet paper tubes, with a paper egg carton cup to close up the bottom. Then we put them in our empty strawberry container for a little green house.


We have at least five of these Frisbees. It made the perfect drip tray since our strawberry basket has drainage holes in the bottom.

I got seeds from my sister-in-law who saved them from her last year's crop of tomatoes. They are regenerating seeds so you can use them to grow more next year etc.
We followed her advice and planted three seeds in each cup, and once they come up, we will pull the weakest and let the strongest survive.

Update:
The setup has worked great so far. Once the sproutlings had their footings we opened the top of the container to get them used to air. This also helps keep mold from growing. It is also good to let them dry out a bit between watering once they get a good start otherwise the soil might get a bit moldy which is not a good thing either. Once they got to this size I pulled out my weaker ones and just left one strong one per toilet paper tube. I also added some more dirt to the top since the rest had kind of settled. Do not pack the dirt, but just fill the cups to the top again to make sure you are keeping the whole root system covered but still allowing some air down there.


Grow little guys! Grow!


Wednesday, March 14, 2012

LEGO Brick Bubbles and Lego Party Bags


We are getting closer to party time. I am trying to do a little bit every day. The hard part is, I keep getting more ideas so my to-do list just keeps growing.

I am super excited it is supposed to be unusually nice outside the day of his party so we will be able to have fun and play outdoors.

So when I saw this box of party bubbles today for $3.50 at Dollar General I knew it was a good idea to grab. I love the bright colors just like Legos. I also know I won't use them all for his party, but I have two more kids parties coming up.


I got them home and opened the box. I was just going to put them into the take home guest party bags as is, but then it struck me that the side panel of each bottle is just about the same size as a Lego brick.

Enter black Sharpie marker...

Six circles and a few lines and you now have LEGO bubbles


I was only able to make the brick pattern on four sides of the six sided bubble container because the other two sides have raised plastic writing on them and so it wouldn't work too well.
I think I got better at free handing the LEGO brick pattern as I went on.
The kids won't care if they are not perfect, and I love my idea!


I also took a pack of 10 yellow sacks from the Dollar Tree, and put the LEGO figure face on them.
I have seen bags decorated with circles to look like a brick, but my boy LOVES yellow and I think the LEGO mini figure face is much more cute.


Linking up here:
For the Kids Friday