Now miss matched frames can look awesome just on their own. See how in this arrangement they just filled them with random things and hung them in an interesting arrangement. I LOVE this!
Found on Flickr here
Yet while I like this, some may not, (like my husband) so here are a few other things you can do.
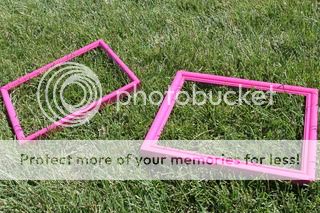
Here were my two frames to start.

Both 5 by 7. Not matching. One super easy fix is just to paint odd miss matched frames all one color.
Just look what a little spray paint can do!

I could use these for photos or art projects in my daughter's room right now.
Maybe go with black spray paint and fill with black and white photos in a neat layered arrangement on a solid wall. This would be I think a very cool look.
Or try this!
Letter Wall Art!

This one came to me on a stroll though Hobby Lobby. In the wall art section they had cute black frames just like these with a black letter in each and a mesh type ribbon tied up top to hang. I thought to myself. "I so could do this easily." Possibilities with this are endless, think of the funky scrapbook paper letters, or even flowers and such you could have in the frame for this project.
What I did was choose a font on the computer I liked and blew it up to 500.

Then I printed it out on strap paper of course, and holding it on a piece of scrapbook paper (Imagine the different colors and patterns you could use) I cut around the letter shape.

Next I sandwiched it between two pieces of frame glass. Use a little tape under the letter to hold it in place so it doesn't slip. (I didn't need the glass for my other frame project so I had an extra one which make this work perfect for me)
I added ribbon to the frame and then glued the pieces of glass in place with a glue gun.

You could do many frames and spell words like BELIEVE or DREAM or your child's name above a crib or their bed. I love how the wall color shows though the frame on artwork like this because it makes the piece match the room automatically.
After I wrote this up, I found another similar tutorial online here
See what a different color can look like! Gorgeous! I love the knob hangers too!
Wall art not for you? Have a go at making...
Travel Felt Boards

Open your frame and discard the glass. I removed the stand on the back and saved it for another project. Then cover the front with some felt. I used white glitter felt. I also covered the back with black felt. Depending on the frame you can either use the closures that are on the frame to secure it into place or you may have to glue it into place depending on if the closures work or not.


Use other felt (we found really cool tie die felt at Michales) to cut shapes and designs to make whatever. Store your pieces in a Ziploc bag and bring it along on long car rides.
The felt pieces stick to the felt so you can hold it up.


Do this with a larger frame in your child's bedroom and the creative wall art can change constantly!
Of course I don't like to throw anything away, so of course I had to find something to do with the frame stand piece I had removed from the frames. This one was obvious! A few cuts here and there, some paint and a couple small holes and it became the perfect...
Play Tie!

With elastic cord to make the on and off easy. Now my youngest son is ready to play house. He is the daddy.


I already can tell that he is going to be a great daddy someday.
Other Crafty Ideas!
Now while these are some things I did do here at home here are some other ideas I liked, but I didn't do because I didn't need them or have the space or frames to do them, but you may!! So I had to include them.
1. Place white paper inside the frame and use wipe off markers for an easy message board.
2. Buy some cork board and cover it with a cool print fabric and use it for a pin message board.
3. Cover some magnetic sheet metal with fabric and make a magnetic message board. Like the one here

4. Fill with fabric and criss-cross some ribbons over it, or yarn around glued buttons to make a snap shot or holiday card holder. This one costs $110 here

5. Paint a board with chalkboard paint and frame it for a fun wall chalkboard like this.

6. Or add some wire mesh or fine chicken wire from the hardware store and made a jewlery holder like the one tutorial here.

Happy Frame Crafting!

No comments:
Post a Comment